- Published on
How to host a Spring Boot application for free with Render
- Authors
- Name
- Kaur Kadak


In this tutorial we'll deploy a Gradle and a Maven project with Spring 3.1.2 and Java 17
Spring Boot offers versatile packaging choices, granting you a plethora of options for deploying your Java application. Today we'll take a look at how to get our Spring Boot project up and running for free with a popular cloud web hosting provider Render 🚀


Lets generate a project to deploy!
For this demonstration we'll generate a demo Spring Boot application with Spring Initalizr and select the relevant fields to us:


- Project: Gradle or Maven
- Language: Java
- Spring Boot: 3.1.2 (Or whatever your latest non snapshot version is)
- Project metadata filled out to your liking
- Packaging: Jar
- Java: 17 (Current LTS version)
I also want to add the Spring Web dependency so I can easily build a REST API using Spring MVC.


I want to share information with the world! AKA Let's build an API.
First I'll start off with creating a simple data transfer object (DTO) to represent a country.
package com.hostingtutorials.demo;

import lombok.AllArgsConstructor;
import lombok.Data;

@Data
@AllArgsConstructor
public class Country {
    private String name;
    private String capital;
    private int population;
}
Lets also create a simple API, with some predefined countries
package com.hostingtutorials.demo;

import org.springframework.web.bind.annotation.GetMapping;
import org.springframework.web.bind.annotation.RequestMapping;
import org.springframework.web.bind.annotation.RestController;

import java.util.List;

@RestController
@RequestMapping("api/v1/cities")
public class RestEndpoint {
    private static final List<Country> COUNTRIES = List.of(
            new Country("United States of America", "Washington D.C.", 339_996_563),
            new Country("China", "Beijing", 1_411_750_000),
            new Country("India", "New Delhi", 1_428_627_663)
    );

    @GetMapping
    public List<Country> getCountries(){
        return COUNTRIES;
    }
}
Packaging the application
Now we want to turn our Spring Boot app into an executable JAR file.
This is going to be the first place now where the command will be different depending if you chose a Gradle or a Maven project.
To package your application with Maven run: mvn clean package
Maven will create your jar file in a directory called /target
To package your application with Gradle run: gradle build
Gradle will create your jar file in a directory called /build/libs
Gradle example:


Test the JAR
Now we can test if our app compiles with our JAR. For this it's as simple as:
java -jar build/libs/demo-0.0.1-SNAPSHOT.jar
Or if I was using Maven:
java -jar target/demo-0.0.1-SNAPSHOT.jar
After running the command, we see that Spring boots up nicely
  .   ____          _            __ _ _
 /\\ / ___'_ __ _ _(_)_ __  __ _ \ \ \ \
( ( )\___ | '_ | '_| | '_ \/ _` | \ \ \ \
 \\/  ___)| |_)| | | | | || (_| |  ) ) ) )
  '  |____| .__|_| |_|_| |_\__, | / / / /
 =========|_|==============|___/=/_/_/_/
 :: Spring Boot ::                (v3.1.2)

...

c.hostingtutorials.demo.DemoApplication  : Started DemoApplication in 2.57 seconds (process running for 3.141)
We can also confirm that if we hit our api through localhost:8080/api/v1/countries then we can see the result provided back to us


Create a Dockerfile
Create a file named Dockerfile in the project root. Copy and paste the following Docker commands into the file. This will be used to create the Docker image, that we are going to deploy on Render.
Maven:
FROM eclipse-temurin:17-jdk-alpine
VOLUME /tmp
COPY target/*.jar app.jar
ENTRYPOINT ["java","-jar","/app.jar"]
Gradle:
FROM azul/zulu-openjdk:17-latest
VOLUME /tmp
COPY build/libs/*.jar app.jar
ENTRYPOINT ["java","-jar","/app.jar"]
Building your docker image
So once our Dockerfile is ready to go it's time to create an image from our Spring Boot project. I recommend you having Docker Desktop as well, so that you can have a visual picture of the image you are creating.
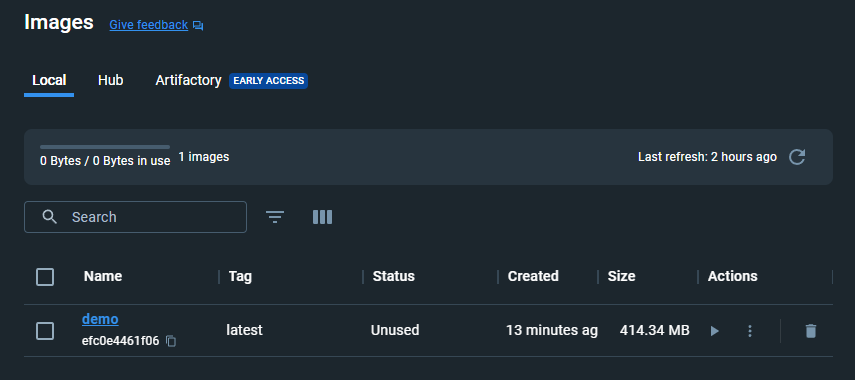
Run: docker build -t demo . and replace demo with your own project name.
Then you should see on Docker desktop that an image has been created:
Deploying time
Render is an awesome platform, with native support for many languages like: Node.js, Python, and Rust. Unfortunately it doesn't have native support for Java, but that's not a problem, because we can host the Docker Image that we just created instead.
I chose to upload my docker image to docker hub but you can also go through github, up to you. I'll leave the tutorial link from Render's page here if you want to go the github route.
Docker hub image upload
Create an account on docker hub, and then create a new repository.
I created a repository called testsbapp and got greeted with following instructions:
"To push a new tag to this repository:"
docker push kaurkadak/testsbapp:tagname
Okay, in the command line, try running the push command you see on Docker Hub.
$ docker push kaurkadak/testsbapp:tagname
 The push refers to repository [docker.io/kaurkadak/testsbapp]
 An image does not exist locally with the tag: kaurkadak/testsbapp
Why did it fail?
The push command was looking for an image named kaurkadak/testsbapp, but didn’t find one. If you run docker image ls, you won’t see one either.
To fix this, you need to “tag” your existing image you’ve built to give it another name. Login to the Docker Hub using the command docker login -u YOUR-USER-NAME.
After that Use the docker tag command to give the demo (or what you called your service) image a new name. Be sure to swap out YOUR-USER-NAME with your Docker ID.
docker tag demo YOUR-USER-NAME/testsbapp
Now try your push command again. If you’re copying the value from Docker Hub, you can drop the tagname portion, as you didn’t add a tag to the image name. If you don’t specify a tag, Docker will use a tag called latest.
Deploying on Render
Once your image is up on docker hub we'll have to go to our account on Render and enable a setting in our profile called Early Access -> Deploy from external registries -> Enable
This will allow us to be able to deploy the public docker image that we uploaded to Docker hub.
After that press on the New + button on the top and choose Web Service. We want to choose the Deploy an existing image from a registry option.


Get your image url from docker hub and slap that bad boy in


Choose the free tier and deploy your application!


Congratulations! Your application is now live. On the top left we will see what our service URL is.


And if we shoot a request against it...


Sucess! ✨✨✨